Insoles for thru-hiking comfort can transform your long-distance trek. Choosing the right insoles provides essential arch support, cushioning, and shock absorption, preventing foot fatigue and pain on demanding trails. This guide will help you find the perfect insoles to keep your feet happy mile after mile.
Insoles for Thru Hiking Comfort: Your Essential Guide

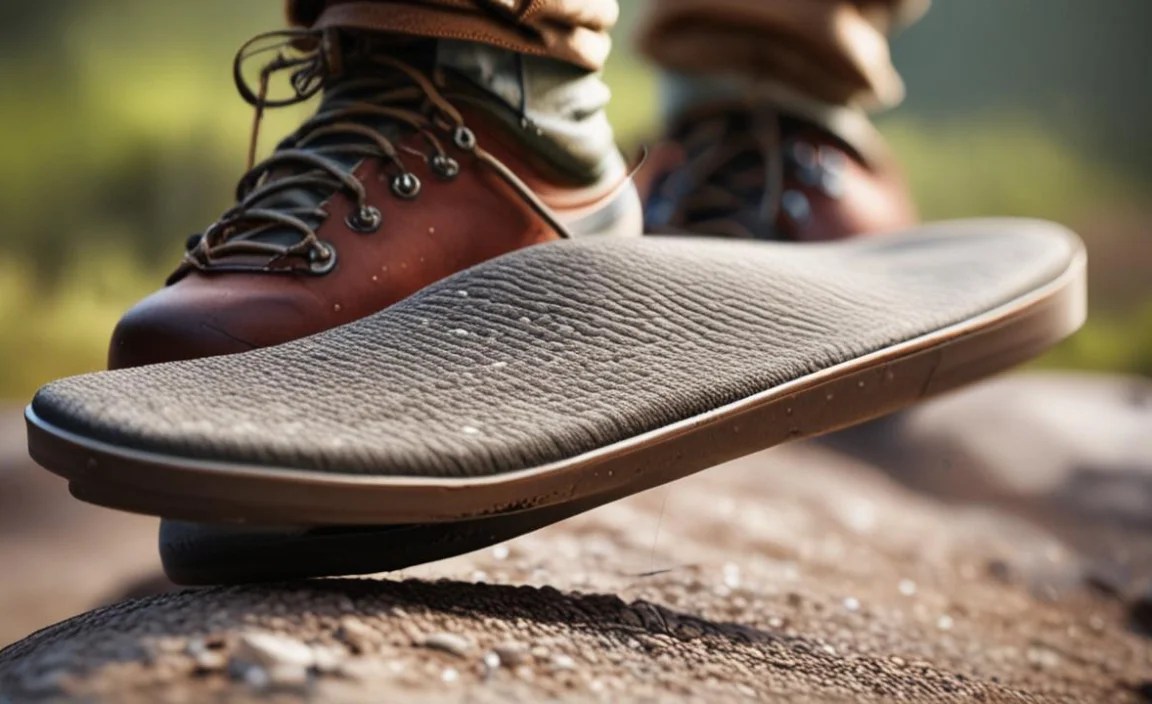
Tackling a thru-hike is an incredible adventure, but it can also be tough on your feet. Blisters, aching arches, and general foot fatigue are common complaints that can cut a dream hike short. The good news is that much of this discomfort can be avoided with the right gear, and one of the most impactful pieces is often overlooked: your insoles! Think of them as the unsung heroes for your feet on the trail. They work tirelessly with every step to provide support, cushion impacts, and help keep your feet feeling fresh, even after hundreds of miles. This guide will walk you through everything you need to know about selecting and using insoles to maximize your comfort and enjoyment on your next big adventure.
We’ll explore why insoles are so crucial for long-distance hiking, discuss different types, and guide you on how to pick the best pair for your unique needs. Get ready to step into a world of enhanced comfort and preparedness!
Why Insoles are a Game-Changer for Thru-Hiking

When you’re covering long distances day after day, your feet are subjected to immense stress. Hiking boots, while essential, have their limitations. Many come with basic insoles that offer minimal support or cushioning. This is where specialized insoles shine. They can:
- Provide Targeted Support: Insoles can be designed to support your specific arch type (flat, neutral, high), helping to distribute pressure evenly and prevent foot fatigue.
- Enhance Cushioning: The impact of each step on hard trails can add up. Good insoles absorb shock, protecting your feet, joints, and even your lower back.
- Improve Stability: A well-supported foot is a stable foot. This can help with balance on uneven terrain and reduce the risk of ankle rolls.
- Control Moisture: Many hiking insoles are made with moisture-wicking materials that help keep your feet dry, reducing the risk of blisters.
- Correct Biomechanical Issues: For some, insoles can help address minor alignment issues, leading to better overall posture and reduced strain.
Imagine walking for 10-15 miles a day, day after day. The cumulative impact and strain without proper support can be brutal. Investing in good insoles is like giving your feet a supportive hug for the entire journey.
Understanding Insole Types: Finding Your Perfect Fit

Insoles aren’t a one-size-fits-all solution. They come in various materials, levels of support, and designs, each suited for different needs. Here’s a breakdown of the common types you’ll encounter:
1. Cushioning Insoles
These are designed for maximum shock absorption and comfort. They are often made of softer materials like foam or gel. While great for general comfort and reducing impact, they might not offer enough rigid support for hikers with significant arch issues.
2. Stability/Support Insoles
These insoles provide more structure and support, often featuring a firmer heel cup and a supportive arch contour. They are ideal for hikers who need help managing overpronation (when the foot rolls inward excessively) or have flatter arches that require more lift. They help maintain proper foot alignment.
3. Performance/Dynamic Insoles
These are often a hybrid, offering a balance of cushioning and support. They might use advanced materials and designs to adapt to your foot’s movement, providing energy return and reducing fatigue during high-impact activities like hiking. They are engineered to support the foot’s natural motion.
4. Accommodative Insoles
These are typically softer, custom or semi-custom orthotics designed to provide maximal cushioning and pressure relief for very sensitive or damaged feet. They are less about correction and more about making an already compromised foot as comfortable as possible. They can be useful for hikers with conditions like plantar fasciitis or neuropathy.
Key Features to Look for in Hiking Insoles

When selecting insoles specifically for the demands of thru-hiking, consider these crucial features:
- Arch Support Type: This is paramount.
- Neutral Arch: Requires moderate support.
- Low Arch/Flat Feet: Needs good support to prevent overpronation and distribute weight.
- High Arch: Needs cushioning and support that doesn’t put excessive pressure on the ball or heel.
- Cushioning Level: Thru-hiking means miles on hard ground. You want insoles that offer substantial shock absorption, especially in the heel.
- Material: Look for durable, moisture-wicking, and anti-odor materials. EVA foam, cork, and specialized synthetic blends are common. Some use antimicrobial treatments to combat odor which is a huge plus on long trips.
- Heel Cup: A deeper heel cup helps cradle the heel, providing stability and preventing the foot from sliding.
- Durability: Insoles will take a beating. Choose brands known for robust construction that won’t break down after a few hundred miles.
- Weight: While comfort is king, very heavy insoles can add significant weight to your pack over time.
- Tread/Traction: Some insoles have a textured surface to prevent slipping inside your boot.
Insole Selection: A Step-by-Step Process
Choosing the right insoles doesn’t have to be complicated. Follow these steps:
- Assess Your Foot Type and Needs:
- Arch Height: Wet your foot and step on a piece of paper. A full footprint indicates low arches, a partial footprint suggests neutral arches, and a footprint with a very thin or no connection in the middle indicates high arches.
- Pain Points: Where do you typically feel discomfort? Heel pain? Ball of the foot? Arches?
- Hiking Style: Are you carrying a heavy pack? Do you often hike on rocky or uneven terrain?
- Consider Your Boots:
- Volume: Some boots have more internal space than others. Very thick, high-volume insoles might make a snug boot too tight, or vice versa.
- Removable Insoles: Most hiking boots have removable insoles that you can easily swap out. If yours are glued in, you might need to carefully remove them or consider different boot options.
- Research and Read Reviews: Look for insoles specifically recommended for hiking. Online reviews from other thru-hikers can be invaluable. See what brands and models stand up to rigorous use.
- Try Before You Buy (if possible): If you can, try insoles on in a store. Walk around in them with your hiking socks on.
- Start with Mid-Level Support and Cushioning: For most thru-hikers, a good mid-level support insole with ample cushioning is a safe bet. You can always adjust later if you find you need more/less of something. Companies like Superfeet, SOLE Footbeds, and Superfeet offer a range of options for different arch types and support needs.
- Break Them In Gradually: Don’t put brand new insoles straight into a 20-mile day. Wear them around the house for a few days, then on shorter walks, before your long hikes. This allows your feet to adapt.
Top Insole Brands and Models for Thru-Hiking

While personal preference plays a big role, some brands consistently receive high marks from hikers. Here are a few popular and reliable choices:
| Brand/Model | Best For | Key Features | Considerations |
|---|---|---|---|
| Superfeet Trailblazer/Green | Neutral to moderate arches, general support and cushioning. | Durable construction, good shock absorption, deep heel cup. | Can be slightly rigid for some; break-in period recommended. |
| SOLE Footbeds (various models) | All arch types (customizable), excellent support and durability. | Heat-moldable for a custom fit, deep heel cup, recycled materials. | Requires heat molding (can be done at home or by a professional); can be pricier. |
| CurrexSole HikePro/TrailMax | Dynamic support, shock absorption, good for various arch types. | Dynamic arch support that adapts to movement, moisture-wicking topsheet. | Can be less rigid than some other options. |
| OOFOS OOamides (recovery) | Active recovery, severe foot fatigue, plantar fasciitis. | Exceptional cushioning and shock absorption (OOfoam technology). | Primarily for recovery or very sensitive feet; may lack firm support for technical hiking. |
| Powerstep Pinnacle | Flat feet, plantar fasciitis, moderate pronation. | Semi-rigid arch support, excellent cushioning, heel cradle. | Can feel a bit firm for those who prefer very soft insoles. |
How to Care for Your Hiking Insoles

To get the most mileage out of your insoles and keep your feet healthy, proper care is essential:
- Air Them Out Daily: After hiking, always remove your insoles from your boots to let them and your boots dry completely. This prevents odor build-up and bacterial growth.
- Clean Periodically: Wash your insoles gently with mild soap and cool water. Avoid harsh detergents or machine washing, which can damage the materials.
- Dry Naturally: Never use direct heat (like a campfire or dryer) to dry your insoles. Let them air dry away from direct sunlight.
- Inspect for Wear: Regularly check your insoles for excessive wear, flattening, or tears. If they’ve lost their cushioning or support, it’s time for a new pair.
Common Insole Myths Debunked
There’s a lot of information (and misinformation) out there. Let’s clear the air on some common myths:
- Myth: All aftermarket insoles are expensive orthotics.Reality: While custom orthotics can be costly, many excellent aftermarket insoles are affordably priced and offer significant benefits for hikers.
- Myth: Insoles will fix all foot problems instantly.Reality: Insoles can greatly enhance comfort and provide support, but they are not a cure-all for serious medical conditions. If you have persistent pain, consult a podiatrist.
- Myth: You need to break in your boots, not your insoles.Reality: Both your boots and your new insoles can benefit from a break-in period. This allows your feet to adapt to the new support and cushioning.
- Myth: The softer the insole, the better the comfort.Reality: While cushioning is important, too little support can lead to foot fatigue and pain. A balance of support and cushioning is usually ideal for hiking.
The Role of Insoles in Preventing Common Hiking Foot Ailments
Many common hiking foot issues can be exacerbated or even caused by improper footwear and a lack of support. Insoles can play a proactive role in preventing:
- Plantar Fasciitis: This painful condition involves inflammation of the tissue band running along the bottom of your foot. Proper arch support from insoles can reduce strain on the plantar fascia. For more on this, the NHS offers a good overview of the condition and its management.
- Blisters: While blisters are often caused by friction from ill-fitting boots or socks, insoles that improve foot stability can help reduce internal foot movement within the boot, thereby decreasing friction points.
- Metatarsalgia (Pain in the Ball of the Foot): Insoles with good forefoot cushioning and metatarsal support can help distribute pressure more evenly, alleviating pain in this area.
- Generalized Foot Fatigue: Simply put, miles of hiking without adequate support will make your feet tired and sore. Supportive insoles reduce the muscles’ workload by providing a stable base and shock absorption.
- Knee and Hip Pain: Foot alignment and support can affect the entire kinetic chain. If your feet are collapsing or not properly supported, it can lead to imbalances that travel up to your knees and hips.
Beyond Insoles: A Holistic Approach to Foot Health on the Trail
While insoles are incredibly beneficial, remember they are part of a larger picture for happy feet:
- Proper Boot Fit: This is non-negotiable. Even the best insoles can’t compensate for boots that are too big or too small. Ensure a snug heel, adequate toe room, and no pinching.
- Quality Hiking Socks: Wool or synthetic blends are best. Avoid cotton, which holds moisture and causes blisters. Consider sock liners for added protection.
- Foot Care Routine: Keep feet clean and dry. Trim toenails carefully. Address any hot spots immediately before they become blisters.
- Strengthening Exercises: Simple exercises like toe curls, calf raises, and ankle rotations can strengthen the muscles supporting your feet and ankles. The Mayo Clinic provides examples of exercises that can help.
- Listen to Your Body: Rest when you need to. Don’t push through severe pain.
Frequently Asked Questions About Insoles for Thru-Hiking
Q1: Do I really need insoles if my hiking boots feel comfortable?
A1: Even comfortable boots might lack the specific support or cushioning needed for the repetitive stress of thru-hiking over many miles. Adding insoles can significantly enhance comfort and prevent fatigue and potential future issues, even if your boots initially feel fine.
Q2: How often should I replace my hiking insoles?
A2: This depends on the insole quality, your hiking intensity, and body weight. For thru-hiking, expect to replace them at least once, possibly more. A good rule of thumb is to replace them when you notice a significant decrease in cushioning or support, or visible wear and tear – typically every 500-1000 miles of intensive use.
Q3: Can I use insoles designed for running or other sports for hiking?
A3: While some general athletic insoles might offer some benefit, insoles specifically designed for hiking are usually more beneficial. Hiking involves different types of impact, terrain, and forces than running, so specialized hiking insoles offer tailored support and durability.
Q4: How do I know my arch type?
A4: The “wet test” is a simple way: wet your foot, step onto a flat surface (like paper or a dark floor), and examine your footprint. A full imprint with little to no curve in the middle suggests low arches. A footprint with a distinct curve in the middle indicates high arches. A footprint showing about half of your arch filled in suggests a neutral arch.
Q5: Should my insoles be heat-moldable?
A5: Heat-moldable insoles, like some SOLE Footbeds, can offer a more personalized fit by conforming to your specific foot shape and arch. This can be very beneficial for comfort and support, but they require the molding process. Many hikers find the custom feel well worth the effort.
Q6: What’s the difference between insoles and orthotics?
A6: “Insoles” is a broad term for inserts placed inside shoes. “Orthotics” are more specifically designed to support or correct biomechanical foot issues and are often prescribed or custom-made by a medical professional (like a podiatrist). Many high-quality aftermarket insoles offer significant orthotic benefits without the custom price tag.
Conclusion
As you prepare for your thru-hiking journey, remember that your feet are your most critical piece of equipment. Investing in the right insoles is not just about comfort; it’s about endurance, injury prevention, and ensuring you can fully enjoy the miles ahead. By understanding your foot type, the features to look for, and how to properly care for your insoles, you can significantly reduce foot fatigue and discomfort. Don’t underestimate.
