Insoles specifically designed for shin splints offer essential support to a person’s feet, helping to reduce the impact and stress that can cause pain along the shin bone. Choosing the right pair means understanding their benefits and how to use them effectively for proven relief.
Hey there! Millard Mar here, your guide from SoleForShoes to happy, healthy feet. Ever felt that sharp, aching pain along your shin bone? It’s a common bother, especially when you’re active or on your feet a lot. We call it shin splints, and it can really put a crimp in your stride. But don’t worry, you’re not alone, and there’s hope! We’re going to dive deep into how specific insoles can be your secret weapon against this discomfort. We’ll break down what makes them special, how to pick the best ones, and how to use them right. Get ready to explore the world of insoles and wave goodbye to that nagging shin pain!
Understanding Shin Splints: Why Your Shins Hurt

Shin splints, medically known as medial tibial stress syndrome, is a common overuse injury. It’s that persistent ache or tenderness you feel along the front of your lower leg. This pain typically flares up during or after physical activity, like running, jumping, or even prolonged walking if your footwear isn’t supportive enough. It’s essentially inflammation of the muscles, tendons, and bone tissue around your tibia (your shin bone).
Several factors can contribute to shin splints. These include:
- Sudden Increase in Activity: Jumping into a new training program or dramatically increasing the intensity or duration of your workouts without letting your body adapt.
- Improper Footwear: Wearing shoes that lack adequate cushioning, arch support, or that are worn out.
- Foot Mechanics: Having flat feet, high arches, or an overpronated gait (where your foot rolls inward excessively) can put extra stress on your shins.
- Hard Surfaces: Regularly exercising on hard surfaces like concrete or asphalt can also be a culprit.
- Muscle Imbalances: Weak calf muscles or tight muscles in the leg can disrupt biomechanics and lead to shin splints.
The pain can range from a dull ache to a sharp, stabbing sensation. It’s your body’s way of telling you something needs attention. Ignoring it can lead to more serious issues, but understanding the root cause is the first step to finding the right solutions. And that’s where the right insoles come into play – they can be a game-changer in managing and preventing this common discomfort.
How Insoles Help with Shin Splints
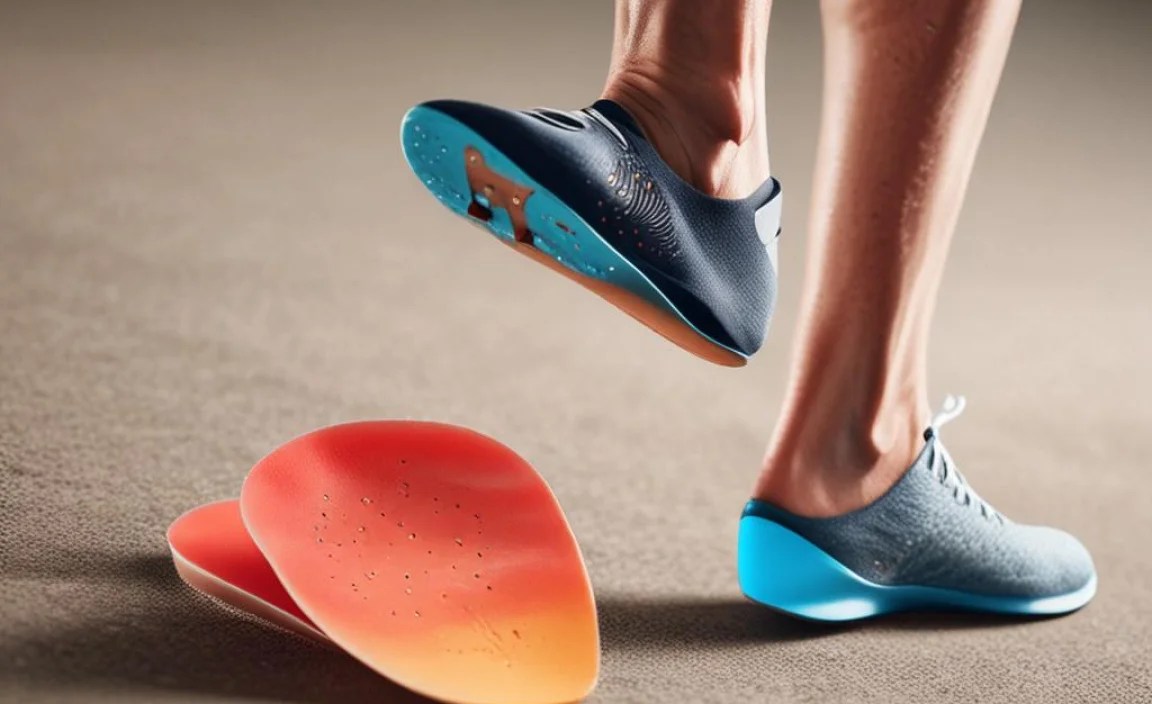
Insoles, also known as orthotics or inserts, are designed to fit inside your shoes and provide added support, cushioning, and sometimes correction for your feet. When it comes to shin splints, insoles work by addressing some of the underlying biomechanical issues that cause the stress on your shins.
Here’s a breakdown of how they help:
- Arch Support: Many people who get shin splints have issues with their arches, either being too flat or too high. Insoles can provide customized or universal arch support, helping to distribute pressure more evenly across the foot and reduce the strain on the muscles and tendons that attach to the shin bone. This is particularly crucial for those who overpronate, as proper arch support helps to control this inward rolling motion.
- Cushioning: Shin splints are often aggravated by impact. Insoles with good shock-absorbing materials, like EVA foam or gel, can significantly reduce the force transmitted to your shins with every step or stride. This added cushioning acts like a mini-trampoline for your feet, softening the landing.
- Shock Absorption: Beyond general cushioning, some insoles are engineered with specific shock-absorbing technologies. This is vital for activities that involve a lot of impact, like running or jumping, helping to dissipate repetitive stress.
- Heel Stability: A stable heel can prevent excessive foot movement, which can contribute to shin splint pain. Insoles with a contoured heel cup can help secure the heel in place, promoting better alignment and reducing strain.
- Foot Alignment: By providing support and stability, insoles can help correct minor alignment issues in the foot and ankle. Proper alignment ensures that your body’s weight is distributed correctly as you move, taking pressure off sensitive areas like the shins.
It’s important to note that insoles aren’t a magic cure on their own, but they are a powerful tool when used as part of a broader approach to shin splint management, which might also include rest, stretching, and proper training techniques. For more information on the science behind biomechanics and foot care, the Mayo Clinic offers valuable insights.
Types of Insoles for Shin Splints

Not all insoles are created equal, especially when you’re looking for relief from something as specific as shin splints. The best insoles for shin splints will typically offer a combination of support and cushioning, tailored to your foot type and activity level. Let’s explore the main types you’ll encounter:
1. Supportive Insoles (Orthotic Inserts)
These are generally designed to address biomechanical issues. They often have a firmer construction and provide significant arch support and heel control. They work to correct overpronation or supination (when the foot rolls outward) and offer enhanced stability.
- Pros: Excellent for providing structure, controlling foot motion, and addressing the root causes of pain related to foot mechanics. Can offer long-term benefits by improving gait.
- Cons: Can be more rigid and may require a break-in period. Might feel less cushioned for some users if not combined with shock-absorbing technology.
- Best for: People with moderate to severe overpronation, flat feet, or high arches who need help managing foot alignment.
2. Cushioned Insoles (Shock-Absorbing Inserts)
These insoles prioritize comfort and impact reduction. They are typically made from softer, more pliable materials like gel or specialized foams that excel at absorbing shock during high-impact activities.
- Pros: Offer superior comfort and immediate relief from impact-related pain. Great for reducing jarring forces on the shins.
- Cons: May not provide enough arch support or motion control for individuals with significant biomechanical issues.
- Best for: Runners, athletes, or anyone who experiences shin pain primarily due to impact on hard surfaces.
3. Combination Insoles
The sweet spot for many! These insoles blend the benefits of both supportive and cushioned designs. They offer a good level of arch support and heel stability while also incorporating shock-absorbing materials to soften each step.
- Pros: Provide a balanced approach, addressing both biomechanics and impact. Often a good starting point for general shin splint relief.
- Cons: May not be as specialized as a fully custom orthotic for severe biomechanical problems.
- Best for: A wide range of individuals, including active people, walkers, and those who need a blend of support and comfort.
4. Activity-Specific Insoles
Some insoles are designed with particular sports or activities in mind. For example, running insoles might focus on forefoot cushioning and heel strike absorption, while hiking insoles might emphasize durability and ankle support.
- Pros: Tailored to the demands of specific activities, potentially offering optimal performance and protection.
- Cons: Might not be as versatile for everyday wear or other activities.
- Best for: Athletes with specific training regimens or those who participate in certain sports regularly.
When choosing, think about what triggers your shin pain most. Is it the impact of each step? Or is it more about how your foot moves and aligns? Often, a combination insole provides the best all-around solution for shin splints.
How to Choose the Right Insoles for Shin Splints

Navigating the world of insoles can be a bit overwhelming, but focusing on a few key factors will make the process much smoother. The goal is to find an insole that complements your foot’s natural structure and supports your activity level to alleviate shin splint pain.
Consider Your Foot Type
Understanding your arch height is crucial. You can easily check this by doing the “wet test”:
- Wet the bottom of your foot.
- Step onto a piece of paper or a dry surface where your footprint will show.
- Examine the imprint:
- Flat Arch (Low Arch): Your entire foot will likely imprint on the paper, showing almost no curve inward. You’ll need insoles that provide substantial arch support to prevent overpronation.
- Normal Arch: You’ll see a distinct curve inward, with about half of your arch imprinted. Standard supportive or cushioned insoles might work well.
- High Arch: You’ll see very little of your arch imprinted, or just your heel and the ball of your foot. You’ll need insoles that offer more cushioning and shock absorption, as high arches don’t absorb impact as well.
Assess Your Activity Level and Shoe Type
What will you be doing while wearing the insoles? And what shoes will you put them in?
- High-Impact Activities (Running, Jumping): Look for insoles with excellent shock absorption and good cushioning. A moderate level of arch support is usually beneficial here.
- Walking/Standing for Long Periods: Comfort is key. A balance of cushioning and support is ideal. Look for features that promote good posture and reduce fatigue.
- Athletic Shoes (Running Shoes, Trainers): Most insoles will fit here. Opt for those that match your foot type and activity.
- Dress Shoes/Boots: Slimmer, lower-profile insoles are usually necessary to fit without making shoes too tight. Support might be more limited.
- Work Boots: Durability and robust support are often important.
Key Features to Look For
When you’re browsing, keep an eye out for these specific features:
- Deep Heel Cup: Helps to naturally align the foot and stabilize the heel, reducing excessive motion.
- Rigid or Semi-Rigid Arch Support: Essential for controlling overpronation and providing stability. The firmness needed can vary based on your foot type and weight.
- Forefoot Cushioning: Can help absorb impact during the push-off phase of walking or running.
- Shock-Absorbing Midsole Material: Look for terms like EVA foam, gel, or proprietary cushioning technologies.
- Breathability: Materials that allow air circulation can help keep your feet dry and comfortable.
Consideration for Professional vs. Over-the-Counter (OTC)
While OTC insoles can be very effective for many, for complex or persistent issues, consulting a professional might be beneficial.
| Type | Pros | Cons | Best For |
|---|---|---|---|
| Over-the-Counter (OTC) Insoles | Affordable, readily available, wide variety of styles and support levels. Good for mild to moderate issues. | One-size-fits-most can be a limitation; may not perfectly address unique biomechanical issues. Quality can vary greatly. | Beginners with shin splints, those seeking general comfort and support, trying insoles for the first time. |
| Custom Orthotics | Tailor-made to your exact foot structure and biomechanics. Offer the highest level of correction and support. Prescribed by a podiatrist or orthotist. | Significantly more expensive, require professional consultation and fitting, may take time to manufacture. | Severe foot conditions, persistent shin splints unresponsive to OTC options, athletes needing precise biomechanical control. |
For most people experiencing shin splints, a high-quality OTC insole that offers a good balance of arch support and cushioning will be a fantastic starting point. If your pain is severe or doesn’t improve, seeking professional advice is always recommended.
Using Insoles Effectively for Shin Splint Relief

Getting the right insoles is only half the battle. To get the most out of them and truly gain relief from shin splints, you need to use them correctly. This involves a gentle introduction, ensuring they fit well in your shoes, and integrating them into a broader recovery strategy.
1. The Break-In Period
Don’t just throw new insoles into your shoes and go for a marathon! Especially with more supportive or firmer insoles, your feet and legs need time to adjust. This is crucial to avoid causing new aches or exacerbating your existing pain.
- Start Slow: Wear your new insoles for short periods at first – perhaps 1-2 hours a day, or for less strenuous activities.
- Gradually Increase Wear Time: Over the next week to 10 days, slowly increase the amount of time you wear them each day. Listen to your body; if you feel discomfort, reduce the time and try again later.
- Consistency is Key: Once comfortable, aim to wear them consistently during your usual activities where you experience shin pain.
2. Proper Fit Inside Your Shoes
Insoles should fit comfortably within your shoes without bunching up, slipping, or making your shoes feel too tight. If they’re too large, they can shift and cause friction. If they’re too small, they won’t provide adequate support or cushioning.
- Remove Existing Insoles: Most shoes have removable insoles. Take these out before inserting your new ones to ensure the best fit and prevent your shoes from becoming too snug.
- Trim if Necessary: Some OTC insoles are designed to be trimmed to fit your specific shoe size. Follow the instructions carefully, and it’s often better to trim too little initially and then trim more if needed.
- Check for Movement: After inserting, walk around a bit. The insole should feel stable and stay in place.
3. Integrate with Other Shin Splint Treatments
Insoles are a powerful tool, but they work best as part of a comprehensive plan. For most effective relief and prevention, consider incorporating these strategies:
- Rest and Reduced Activity: Allow your shins to heal. Temporarily reduce or stop activities that aggravate your pain.
- Stretching: Regular stretching of the calf muscles and the muscles in the front of your shin (tibialis anterior) is vital.
- Strengthening Exercises: Gentle strengthening of calf muscles, as well as the muscles in your feet and ankles, can improve stability and support.
- Ice Therapy: Applying ice packs to the sore areas for 15-20 minutes several times a day can help reduce inflammation and pain.
- Proper Training Progression: When you return to activity, do so gradually. Avoid sudden increases in intensity, duration, or frequency.
- Surface Awareness: Try to avoid running or training on very hard surfaces whenever possible.
For more detailed guidance on recovery and prevention, resources like the NHS website provide excellent, evidence-based advice.
4. When to Seek Professional Help
While insoles can offer significant relief, it’s important to know when to consult a healthcare professional, such as a podiatrist or physical therapist:
- If your pain is severe or doesn’t improve with rest and conservative treatment (including insoles).
- If you experience numbness, tingling, or significant swelling.
- If you suspect a stress fracture or another more serious injury.
- If you have complex foot deformities or persistent gait issues that OTC insoles don’t adequately address.
A professional can provide a precise diagnosis, recommend custom orthotics if needed, and develop a tailored rehabilitation program.
Popular Insole Brands and Features for Shin Splints
As you start looking for insoles, you’ll notice many brands and models claiming to solve your foot woes. While I always encourage trying them on if possible, understanding what makes certain brands stand out for shin splints can guide your search. Here’s a look at some popular options and what to look for:
Top Features to Prioritize:
- Good Arch Support: Look for a noticeable, firm arch.
- Deep Heel Cup: Provides stability and cradles the heel.
- Shock-Absorbing Materials: EVA foam, gel, or polyurethane are common.
- Durability: Insoles that can withstand regular use without quickly flattening.
- Comfortable Top Cover: Helps with moisture-wicking and reduces friction.
